


Table of Contents
Hello! Today we will make a delicious sandwich bread slice from felt! And in the end, we will have everything to make a perfect and healthy felt sandwich, along with sliced cheese, salad leaves, and tomato slices.
As with all my felt food tutorials, I also include a printable pattern and photos to help you with the process. It’s an excellent starter for making felt sandwiches, and I’ll soon be sharing how to make various fillings. Then let’s get started!
You can use any felt while sewing felt. Craft felt is easy to work with, inexpensive, and readily available, but not as good as wool felt. Craft felt can fluff up with time, but it can be shaved off by washing it in warm soapy water.
Wool felt wears better and lasts longer. If you are creating something that you want to pass on from child to child, it is best to use wool felt. If you’re planning to use wool felt, you may want to practice on craft felt first, so you don’t spend money on more expensive stuff. I often use Eco-fi felt made from recycled plastic bottles in my felt DIY projects.
You can find the free felt sandwich bread slice pattern below, download it to your computer, print it out, and start working. To add some variety to your felt dinnerware set, you can cut the felt sandwich bread slice pattern in slightly different ways to sew slices of felt sandwich bread with different looks.
Skill level: Novice friendly, suitable for beginners.
Completion Time: Approximately 30 minutes. It may take a little more time on the first try.
Finished size: approx. 3′ (8 cm)
Useful Note: Felt is a fabric made by pressing natural or synthetic fibers together. Felt comes in various textures and qualities; some are quite soft, while others are pretty stiff. The hard felts are strong enough to be used as construction material. I generally use Eco-fi acrylic felts of 2 mm – 3 mm thickness in my works. While washing the felts, I did not experience shrinkage and elongation problems, but you may experience such issues with some soft and natural felts. You can get to know the felt you use better with trial and error.
You can also read my article “What are Felt Types” to learn more about felt types.
Warning: Children have a vivid imagination so that children can bite off felt food, and especially young children can suck on felt toys by putting them in their mouths. As a result, disinfecting the felts before beginning DIY felt projects would ensure that you are clear of any pests that may be present. Also, keep in mind the child’s age with whom you are working on the project when producing felt foods. Finally, it would be best if you never gave small objects to children who still put things in their mouths, as they can pose a choking hazard.
You can find the free Felt Felt Sandwich Bread Slice pattern at the bottom of the article and download it to your computer.
Tip: I use a sewing needle as fine as possible when sewing felt toys. Because the points where the dip of the needle are not as noticeable when sewing felt with a small sewing needle, stitching felt is considerably more manageable.
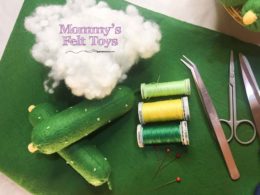
Tools Required for Sewing Felt Sandwich Bread Slices
- Craft Scissors
- Detail Scissors
- Embroidery Needle
- Flat Pins
- Wooden Skewer or Stick
- Cutting Machine – Cricut Maker or Silhouette Cameo 4 (It is optional, not mandatory for cutting template shapes.)
Materials Required for Sewing Felt Sandwich Bread Slices
- Wool Blend Felt – Light brown and cream-colored felts will be suitable. For good flatbread, I recommend using stiffened felt.
- Embroidery Thread — Felts and similar brown and cream tones are suitable.
- Polyester Fiber Filling
- Printable Felt Food Sandwich Bread Slice Pattern. (You can find it at the bottom of this post.)
How to Make Felt Sandwich Bread Slices?
Begin by cutting out the sandwich bread slice pattern from felt. Next, cut out the pattern by pinning it to your light brown or cream felt. For each slice of bread, you’ll need two pieces. Now measure 3/4 of the way inward along the long edge of a sheet of brown felt.
Insert a few needles along the 3/4 inch mark and cut them to get a long felt 3/4 inch wide strip. Take the ribbon you cut and pin it along the new edge.
Cut a second strip using the first one as a guide. So you will have two long strips of brown felt. Thread an embroidery needle with three-foot embroidery thread and place the two felt strips together.
Sew one end of the fabric together. In this manner, you’ll have one long edge strip, the bread’s crust edge. Ensure the seam side of the crust strip faces the center of the slice of bread when connecting it to the bread so that the seams are hidden from the outside.
Now bind one end of the crust strip to the underside of a slice of bread. Next, assemble the base by placing the pin in the center and extending the pin by about 1/2 inch with the brown felt. Next, insert your needle between the two layers of felt.
This way, you will hide your node inside. Next, start sewing the edges of your bread using the blanket stitch. Adjust the shell piece to fit the curves as you go. If you need more thread, knot it from the inside and start a new thread.
Trim the crust felt ends to about 1/2 inch and turn them, so the inside of the bread is visible. Complete the seam along the bottom by pinning them in place.
Then sew where the two brown pieces meet using a small whip stitch. Tie the knot, and we’re halfway done. The outside of the piece of bread should look like this.
Spread your fiber filling flat on the inside of the bread for the interior. Use your hand to feel even and stuff a little to harden the last piece of bread. Now put your second piece of bread on top, making sure the corners and folds line up as close as possible. If the top is bent too much, it will cause the entire piece of bread to turn.
Using your thumb, begin to sew around the top as you attach the bottom to press the fiberfill down and make way for the seams. Sew the top completely.
- Download and print the felt sandwich bread slice pattern I provided to your computer, then cut the patterns out of paper.
- Pin the patterns onto the appropriate colored felt, then use sewing scissors to cut the felt.
- Place one piece of light brown felt on top of a second soft brown felt and pin it with a needle. You’ll be able to cut both parts simultaneously this way.
- Place the sandwich bread template on the felt and use a marker to draw the basic form. If you are using chalk, I recommend using shades with contrasting colors. Remove the pattern.
- Cut along the marks using standard scissors. You will end up with two empty slices of sandwich bread.
- For two pieces of sandwich bread, you will need four strips of dark brown felt. Place one piece of dark brown felt on top of a second dark brown felt and pin it with a pin.
- Place the edging pattern on the felt and draw the basic shape on the felt using a marker. Here, light-colored chalks will give the best contrast.
- Lay a long strip on top of the short one at a 90-degree angle. Sew in a diagonal line from the upper right corner to the lower-left corner. If you remove the long strip, it will bend at the seam and have a single long strip.
- The single long strip must lie in front of you with the seam facing the table.
- Bring both marks together and sew the loose ends together. Trim any loose ends that are hanging off.
- You should have one round dark brown edging piece at this stage.
- Align the stitch we made in the previous step with the upper right corner of the light brown sandwich-shaped piece of felt. Make sure the seam is visible.
- Start sewing in the top center, carefully sew along the aligned edge, and follow the sandwich’s shape.
- Sew the corners gently and, if necessary, elevate the needle to turn the felt. Hold the dark brown edge felt in place with your left hand’s fingers, as seen below. Backstitch your seam at the end to keep it secure.
- You will now have one light brown felt, and one fully edged felt.
- The dark brown edge will be clamped after sewing.
- The second piece of light brown felt will be sewn next. You must, however, leave a hole to turn the sandwich bread out at the end this time.
- Use pin needles to gently pin each corner together after placing the second piece of felt on top of the first.
- Start sewing from one side of the planned opening and backstitch to secure the seam.
- Next, carefully sew the second light brown felt piece to the edge piece. Again, let the shape of the bread be your guide as you sew. Please pay special attention to the seam position that connects the first piece of sandwich to the hem, as it can easily slip under the presser foot.
- Turn the bread over through the opening and carefully finalize each corner.
- Using a standard needle and brown thread, close the aperture. You can use sewing techniques known as ladder or blind stitching.
- Repeat the previous steps to make the second loaf of bread you will need.
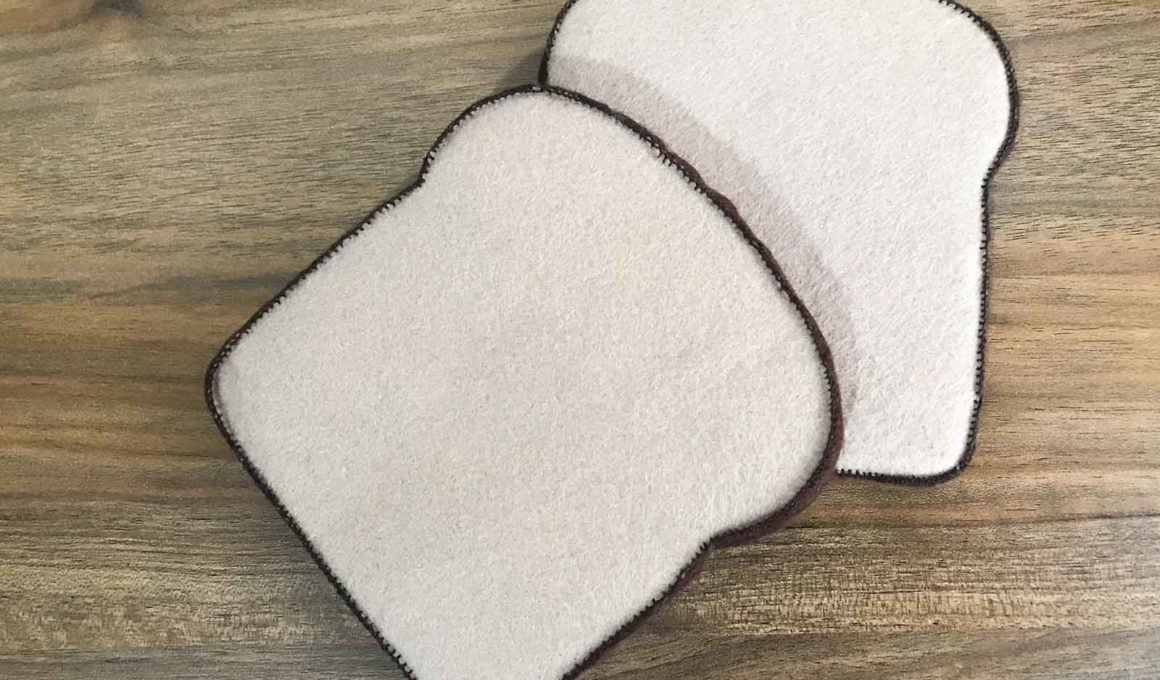
- Your felt sandwich bread is ready! Bon appetit 😊
Note: Using the hardened felt will keep your bread nice and flat.
You made super realistic felt sandwich bread, and I hope you had a lot of fun. Now you only need to make one more slice, and you will have enough bread for a sandwich! I hope you enjoy making this felt sandwich bread!
You can use different shades of light brown to differentiate your slices of felt sandwich bread. I like to imagine how the little ones will decide whether to choose classic or whole wheat sandwich bread for their creative felt breakfast.
Adding felt food to your activities can help your children learn. Felt food toys can also aid in developing good eating knowledge in your children. Felt dishes will be a welcome addition to your children’s pretend kitchen and enhance their enjoyment of imaginative activities.
More Felt Food Projects: Of course, these are not the only options for making your own felt dishes. If you wish to expand your collection of felt food toys, consider the following projects:
- Felt Fried Egg Sewing Tutorial & Pattern
- How to Make Felt Carrot
- Felt Bacon Sewing Tutorial & Pattern
- How to Make Felt Potatoes
Making toys from felt food is easy to DIY projects requiring minimal sewing skills. While basic sewing skills and some hobby time are not necessary, it is preferable to have them to make felt patterns a reality.
Because I make all of the felt toys I provide by hand, none of my felt patterns or instructions are required to use a sewing machine. You may, of course, sew the DIY felt food I shared with a sewing machine if you wish. You’ll be able to finish this project idea in no time with these straightforward, do-it-yourself felt patterns and clear directions, and you’ll end up with gorgeous felt plates to show for your work.
To help the felt pattern remain longer, try printing the patterns on a more rigid material. The pattern can then be drawn by tracing the shapes on the felt with a ballpoint pen on the hard material. Secure the felt before cutting to keep the layers from slipping after removing the pattern.
The felt pattern files you will download will be in PDF format. It’s also the size of an A4 sheet. In truth, most modern web browsers can read PDF files automatically, but if you run into problems, you’ll need Adobe Reader to view PDF files. Adobe Reader can be downloaded for free from Adobe’s website.
You can enlarge or reduce the size of the design before cutting it out if you want larger or smaller objects.
Yum, Yummy Yum! Happy Felt Food!


I was pretty pleased to discover this great site. I need to to thank you for your time for this particularly fantastic read!! I definitely appreciated every part of it and I have you book marked to see new stuff on your blog.