Table of Contents
I used to have a toy kitchen when I was a kid, and I love making eggs for breakfast for my family. Now that I’m older and have a daughter, I want to make her handmade felt playthings so she can enjoy cooking for everyone during the game or while we cook next to her in the kitchen!
Making fried eggs from this felt was straightforward and took me about half an hour to complete. Stay tuned because I will have more tutorials coming with free printable patterns.
Please feel free to use these free felt patterns to create some play food for you! You can multiply as many as you want to make multiple pieces of felt eggs!
Yes, in this felt tutorial, we will talk about making a sunny-side-up egg out of felt. This fun and super easy-felt project are perfect for beginner felting food makers. The felt food crafter, the sunny-side-up egg, can be our first step toward felt food crafting for many of us.
We will make our felt egg using bright yellow egg yolk and egg white felt. This craft can also be done using straw-colored felt, albeit it will have a somewhat paler tone.
Felt fried eggs can be made with a sewing machine but can also be sewn by hand. If you’re not sewing, you can also use felt fabric glue to stick the pieces together. When making felt foods, please consider the child’s age you are projecting. You should never provide small or breakable objects to children who still put things in their mouths since they can cause choking.
You can use any felt while sewing felt. Craft felt is easy to work with, inexpensive, and readily available, but not as good as wool felt. Craft felt will puff up with time, but you can remove it with a shaver after washing it in warm soapy water.
Wool felt wears better and lasts longer. If you are creating something that you want to pass on from child to child, it is best to use wool felt. If you’re planning to use wool felt, you may want to practice on craft felt first, so you don’t spend money on more expensive stuff. I often use Eco-fi felt made from recycled plastic bottles in my felt DIY projects.
You can find the free felt sunny side up egg pattern below, which you can download to your computer and print out to get started. Cut the felt egg pattern in slightly different ways to sew felt fried eggs with distinct looks to add variety to your felt dinnerware set.
Skill level: Novice friendly, suitable for beginners.
Completion Time: Approximately 30 minutes. It may take a little more time on the first try.
Finished size: approx. 3.5′ (9 cm)
Useful Note: Felt is a textile product that presses natural or synthetic fibers together. Some felts are pretty soft, while others are somewhat rigid. The stiff felt is strong enough to be used as a construction material. I generally use Eco-fi acrylic felts of 2 mm – 3 mm thickness in my works. While washing the felts, I did not experience shrinkage and elongation problems, but you may experience such issues with some soft and natural felts. With trial and error, you can get to know the felt you use better.
You can also read my article “What are Felt Types” to learn more about felt types.
Warning: Children have a vivid imagination so that children can bite off felt food, and especially young children can suck on felt toys by putting them in their mouths. So, before you begin your DIY felting crafts, don’t forget to disinfect the felts. Also, keep in mind the child’s age you’re working with when crafting felt foods. Finally, it would be best if you never gave small objects to children who still put things in their mouths, as they can pose a choking hazard.
You can find the free Felt Fried Egg pattern at the bottom of the article and download it to your computer.
When stitching felt toys, I use a sewing needle as thin as possible because the points where the dip of the needle are less visible when sewing felt with a thin sewing needle; stitching felt is considerably easier.
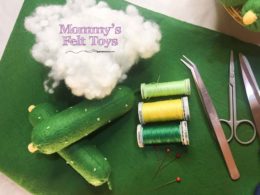
Tools Needed for Sewing Felt Fried or Sunny Side Up Eggs
- Craft Scissors
- Detail Scissors
- Embroidery Needle
- Flat Pins
- Wooden Skewer or Stick
- Cutting Machine – Cricut Maker or Silhouette Cameo 4 (It is optional, not mandatory for cutting template shapes.)
Materials Needed for Sewing Felt Fried or Sunny Side Up Eggs
- Wool Mix Felt – A white felt piece for egg white and a yellow piece of felt for egg yolk will be suitable.
- Embroidery Thread — Felts and similar colors of white and yellow are suitable.
- Polyester Fiber Filling
How to Make Fried or Sunny Side Up Eggs from Felt?
First, start by cutting your pattern pieces. The felt pattern contains egg white and egg yolk. Then lay your egg white pattern piece on the white felt and cut it out. You will need two parts of egg white. The last piece needed is the egg yolk, which will be made of yellow felt. Now let’s get to sewing and make our felt egg!
Put the yolk on a piece of egg white and pin it in place. Thread some yellow embroidery thread and start sewing around your yellow. Sew all the way through, leaving a small opening. Place a small amount of fiber filling in the yolk.
Then sew with the yolk closed. Next, grab your other piece of egg white and a tiny amount of fiber filling. Shape the fiberfill to be flat and slightly smaller than the white egg shape and place it on top.
Now put your main piece of egg white and yolk on top and secure the edges ultimately. Next, thread some white embroidery thread and sew all around the egg.
Tie a knot and pull it into the egg, and cut the thread so that the knot disappears. Now you have a finished egg with some fluffy whites and yolks.
The felt fried egg pattern is below, and all you have to do is click on it and go to the page where you can print it!
- Download and print the felt egg pattern I provided to your computer, then cut the patterns out of the paper.
- Pin the patterns onto the appropriate colored felt, then use sewing scissors to cut the felt.
- Thread a sewing needle with yellow embroidery floss and attach the egg yolk to a piece of egg white.
- Start sewing the yellow felt to the egg white felt. Stop when you reach 2/3 of the yolk and put a small pinch of stuffing underneath.
- Then complete the circle and tie it under the egg white layer.
- Thread a sewing needle with white embroidery floss and pin the second layer of egg white over the stitch on the back of the first.
- Start sewing the edges of the two layers of egg white.
- Hide the first node and the last node between layers.
- Your sunny-side-up eggs are ready! Bon appetit 😊
Felt fried egg would be a great addition to the breakfast food felt food playset. You can make several different types of eggs and let your little chef play and experiment by taking orders and delivering eggs to play meals. When paired with felt waffles, bacon, or other felt food toys, the breakfast food makes an essential addition to the felt meal playset.
Adding felt dishes to your activities can help you educate your children. Felt food toys can also aid in developing a healthy eating awareness in your children. In addition, felt dishes will be an invaluable addition to your children’s pretend kitchen and enhance the fun of imaginative activities.
More DIY Felt Food Projects: These aren’t the only ways to make your own felt food. If you want to add more felt toys to your felt collection, you can try the following fun projects:
- How to Make a Felt Tomato
- How to Make Felt Carrot
- Felt Bacon Sewing Tutorial & Pattern
- How to Make Felt Potatoes
Making toys out of felt food is a simple DIY project that requires no sewing skills. However, to make felt patterns a reality, you’ll need some basic sewing abilities and spare time.
All of the felt toys I show and recommend are hand-sewn and do not require a sewing machine. You can, of course, also sew with a sewing machine if you choose. However, you’ll be able to finish this project idea in no time with these straightforward, do-it-yourself felt patterns and clear directions, and you’ll have gorgeous felt dishes to show for your work.
To make the felt pattern last longer, you might wish to print the patterns on more firm material. Then, using a ballpoint pen on the hard material, trace the shapes on the felt to create the pattern. Secure the felt before cutting to keep the layers from slipping after removing the pattern.
The felt pattern files that I share and download are PDF and have A4 size. Most modern web browsers can open and view PDF files. However, you may still need Adobe Reader to view PDF files. Therefore, you can download Adobe Reader for free from Adobe’s website and install it on your computer to view the felt pattern files.
If you desire larger or smaller things, expand or reduce the size of the design with a copier before cutting it out.
Yummy! Happy Felt Food!